
When I googled “fresh pasta recipe” just now, I came up with over four million hits. Even assuming some of those hits are for recipes with fresh pasta you buy at the store and porn sites (you know how devious those porny spammers are), I would conservatively estimate that hundreds of thousands of them, if not over a million, are recipes for making fresh pasta.
Everybody’s doing it. It’s a rite of cheffy passage. By the late 90’s, you couldn’t go to a cocktail party without overhearing a foodie ‘casually’ mention the fresh pasta they’d made the other night.
So why, you may ask, am I listing a fresh pasta recipe on this site? Well, first of all because I use it a lot – it’s cheap, it’s a crowd-pleaser, and it freezes well. Second, I really do believe that my recipe is that good. I have obsessively tweaked it to come up with what I think is a near-perfect pasta. The use of both semolina and Tipo 00 flour and the substitution of yolks for whole eggs result in a pasta that is silky but not limp, and resilient enough to be rolled into delicate thin sheets for making filled pastas. This recipe is great for linguine, fettucine, and most ravioli and tortellini. (If you’re making extruded pasta or using a very delicate sauce or filling, the recipe will be slightly different.)
Pardon me while I wheel out the soapbox again.
Don’t bother making fresh pasta with all-purpose flour. The amount of gluten in regular flour (and even in cake flour) creates chewy pasta. Go to the trouble of finding and using Tipo 00 (“farina di gran tenero”). If you’re using all-purpose flour, you’re not making pasta, you’re making spaetzle. Okay, ’nuff said.

Ingredients
150 grams semolina
300-350 grams Tipo 00 flour
3 eggs
3 egg yolks
Method
Mix together 150 grams of semolina and 300 grams of the Tipo 00 flour. You want to create a mound with a little well in the top, but I don’t think it’s necessary to start and finish on a board or your counter. I personally prefer to do the initial stage in a big mixing bowl.
Put eggs and yolks in a bowl and pour all at once into the well at the top of your flour. Using a fork, gently beat the eggs, gradually stirring in flour from the sides of the well. (You can also do this with your fingers.) When you’ve incorporated about half the flour, use your fingers and hands to mix in the dough from the sides of the bowl, adding more flour as needed. You want a stiff dough, not a soft moist dough like a bread dough, as a moist dough will get sticky and tear when you try to roll it thin.

When all or most of the flour is incorporated, turn the dough out onto a board or a counter very lightly dusted with Tipo 00. (If you have incorporated enough flour, your dough will not stick.) Knead forcefully for at least ten to fifteen minutes. This step is essential to develop the glutens in the flour. Punch the dough, whack it on the counter, push it and work out your frustrations on it. By the end of this your arms and shoulders should be burning like you’ve just had a session with a personal trainer.
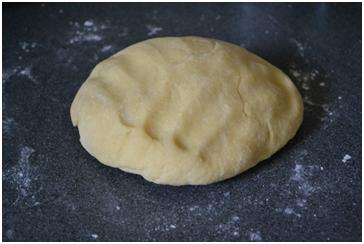
Wrap the dough in plastic wrap and allow it to rest for at least 30 minutes and up to overnight. (If you intend to roll and cut your pasta the next day, put the wrapped dough in the refrigerator, but it’s got a limited shelf life. Don’t use it if it turns gray.)
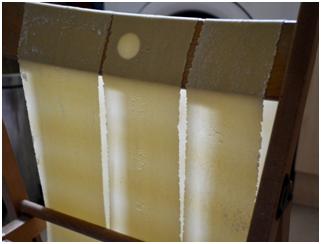
I use a pasta machine to roll and cut my dough. You can also do it with a rolling pin, but I have never tried this, and I think it would probably be difficult to get your pasta dough thin enough. A pasta machine is a worthwhile investment, and you will use it if you have it. Either way, using a little flour to prevent the dough from getting sticky, fold the pasta in thirds, roll it through the first setting, and refold it and reroll it a couple of times before passing it through the thinner settings.

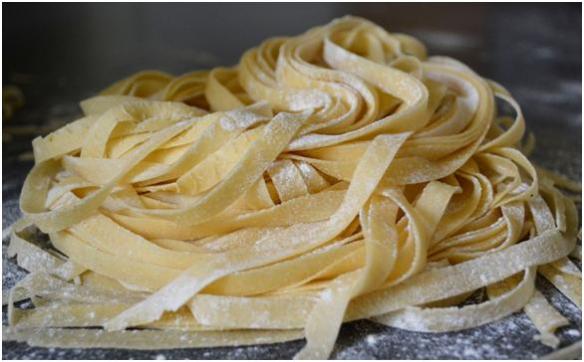
If making linguine or fettucine, once you have gotten your pasta dough to the desired thickness (I go to setting 6 on my pasta machine for fettucine and linguine and setting 7 for lasagne or filled pasta), hang it to dry for about 15-20 minutes, until the pasta is slightly stiff, but before the edges are dry. (I do not dry my pasta when making filled pastas.)
Dust with flour and cut. After you have cut your pasta, you can freeze it by coiling it around your hand in little nests, as per the photo above, and storing. Bravo! You have made fresh pasta.
Makes approximately 6 main course servings,

One of my fondest memories is of eating pasta at your place in Seattle back in the 90’s. I can only imagine what that experience would have done to me if you’d been making your own pasta back then! Congrats on your blog, Dear. Hope to bother you in London one of these days soon. D
This is an excellent post! Last time I ate fresh pasta is was cough-searingly hot with too much pepper!
Darci, if you come to London, I promise you I’ll cook you fresh pasta.